Friday 6 August 2010

Welcome to my Learning Blog!
Untitled-1
Photography 1: The Art of Photography
Open College of the Arts

Down the right hand side of the page you will find an archive of all of my posts. On the left hand side there are quick links to the posts which contain completed Projects and Assignments. I hope you enjoy my Blog as much as I’ve enjoyed writing it in order to complete my first course with the OCA!


Student Name: Michael Moore

Student Number: 499246

Course: Photography 1: The Art of Photography


Wednesday 14 July 2010

Final Thoughts and Next Courses

Narrative and Illustration

The Aim of "7: Narrative and Illustration" was to help me to approach photography from the point of view of the subject and to show how to tell a story both in a set of pictures and within a single picture. This includes learning the techniques of visual analogy, juxtaposition and certain special effects.

During Narrative and Illustration I have learnt how to tell a story with a single photograph. Single shots are useful when a scene needs no explanation for a viewer to see what is happening or what has just occurred. Another use is within photo journalism, the subject will often be the most important factor and therefore if the shot is poorly composed or even unfocused it may still adequately tell a viewer something important. Narrative picture essays are useful for telling a story. They’re particularly useful  as part of tutorials/guides and sets of instructions.

Narrative has further reinforced the importance of planning a shoot, which was touched upon in 5: Natural Light. Planning is important when capturing events so that viewpoints can be decided upon before the event occurs. It is then a case of getting to a your chosen viewpoint during the event instead of wasting time looking for one after it has begun. The same applies for shooting the sunrise. It is much easier to find a viewpoint in daylight the day before and then return the next morning when it is dark and simply await the sun’s arrival on the horizon.

Completion of My First Course

I have now (finally) completed my first course with the OCA (Photography 1: The Art of Photography) and have enjoyed it immensely. I feel it has helped me to vastly expand my knowledge of Photography and also my practical skills. Before beginning the course I had hardly used a DSLR and now I feel I’m a very competent user. I already had a vast interest in photography and have owned a number of compact digital cameras and a digital video camera and I felt I wanted to expand this hobby into something more. It’s taken me a little over a year to complete this course but I’m hoping to complete the next a lot faster. My work is due for Assessment in September so I’m eagerly awaiting my final result!

Next Course

Having completed the Art of Photography I have just enrolled on my next course Digital Arts 1: A Creative Approach in order to continue my journey towards a BA Hons in Photography. I’m very much looking forward to working on the projects of A Creative Approach as I feel I’m already a very confident pc user. Having seen a number of the projects, most involving the use of a scanner, I am not at all worried that I’ll have any problems as I’ve been using scanners for many years.


Thursday 1 July 2010

Rain

Below is a shot I have taken that I feel portrays rain quite well. To produce this shot I simply sprinkled the garden hose over the bonnet of my car and set my camera on a tripod. It was taken at 22:02 on 30th of June therefore the sun was just about to set and the sky was overcast, as it would be if it were actually raining.

rain dropsISO- 1600, 200mm, 1/8sec, f/5.6

I decided to take this shot so late in the evening purely because of the dull light conditions. I like how even though the bonnet of my car is black, I can still see the colour of the sky reflected in it. The dull light conditions and extremely diffused light help to create a nice gradual contrast between the lit and shadowed areas. f/5.6 is the widest aperture I was able to achieve as 200mm and so I needed an alternate way to correctly expose the shot. I used a very high ISO of 1600 instead of a long shutter speed because some of the water droplets were moving and didn’t want them to end up blurred.

Wednesday 30 June 2010

Assignment 5: Applying the techniques of Illustration and Narrative

To see exactly what I sent to my tutor please visit my set on flickr at http://www.flickr.com/photos/mikemoore88/sets/Assignment5

For this assignment, I decided I wanted to create a storyboard of my girlfriend making some muffins. I feel the different stages clearly illustrate the passage of time and progression towards a final result.

Chocolate-Chip Muffins

Ingredients: (for 12 Muffins)

  • 1 3/4 cups of Self Raising Flour (220g)
  • 2 tablespoons of cocoa powder (Lindsay used Nesquik milkshake powder)
  • 3/4 cup of Muscovado Sugar (165g)
  • 3/4 small packet of White Chocolate Chips
  • 1 cup of Milk (250ml)
  • 1/3 cup of melted Butter (76g)
  • 1 egg

Directions

Preheat oven to 400 degrees F (205 degrees C).

Put all of the dry ingredients into a mixing bowl. Put all of the liquid ingredients into a measuring jug. Pour the liquid into the dry ingredients and mix together. Lumpy batter makes the best muffins so don’t beat too hard. Place 12 muffin cases onto a baking tray and spoon the mixture into them. Bake the muffins for approximately 20 minutes or until they are dark, risen and springy.

Once the muffins are ready, remove from oven and leave to cool before eating.

(Pouring melted chocolate and sprinkling the remaining chocolate chips on to each muffin is a nice touch and adds to the flavour.)

Lighting: a mixture of the kitchen’s Tungsten lights on the ceiling, fluorescent lights under the cupboards and my flash unit aimed at the ceiling. Lindsay baked the muffins in the evening and therefore there wasn’t any light entering the room through the windows. I aimed my flash unit at the ceiling as it provided the most attractive lighting. The ceiling acted as a reflector and a diffuser. When the light was reflected back at my scene it became very scattered, meaning that shadows weren’t too harsh gave a nice modelling effect.

The Event: Baking Chocolate - Chip Muffins

Preparation: Get all of the equipment and ingredients ready for use and set the temperature of the oven.

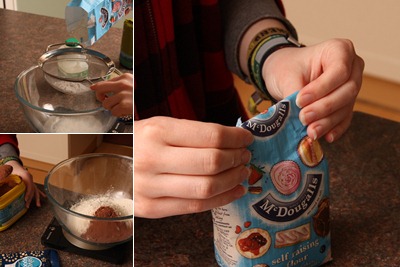
Open the ingredients, weigh the flour and add the cocoa powder to the mixing bowl.

Add the white chocolate-chips and sugar to the mixing bowl and weigh the butter.

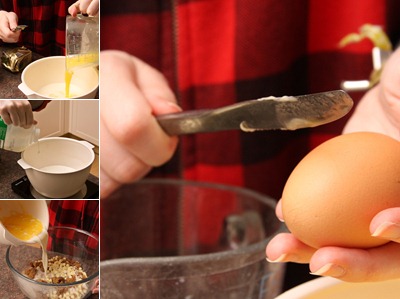
Crack the egg, melt the butter, add them to the milk and mix into the dry ingredients.

Stir the mixture 12 Here I used a slow shutter speed to try and capture the movement of Lindsay stirring.

Spoon it into the muffin cases.

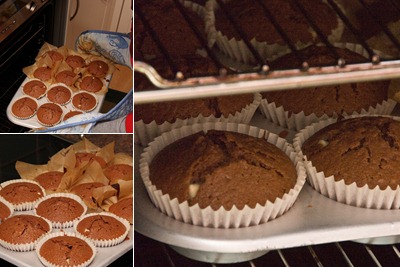
Place the muffins in to the preheated oven and wait approximately 20 minutes.DPP_0028
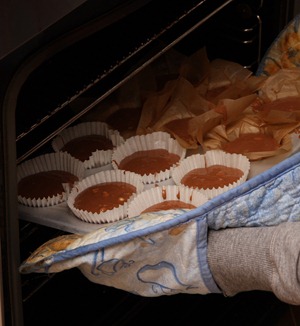
When ready, remove the muffins from the oven and leave to cool.

And finally it’s time to sample the finished article!

Summing it up: Myself and Lindsay truly enjoyed completing this project!! I feel I’ve managed to capture some great shots that illustrate the recipe and instructions adequately. Also, Lindsay’s muffins were absolutely delicious!!

To see exactly what I sent to my tutor please visit my set on flickr at http://www.flickr.com/photos/mikemoore88/sets/Assignment5

Tutor Feedback

Overall Comments

Hello Michael,

Many thanks for sending in your fifth and final assignment which as usual you have handled very well. The print quality is good and the subject matter you have chosen would make a very good article for a womans magazine or cookery book, as you comment on in your notes. Please find below my comments in more detail:

Feedback on assignment

Cover Image

According to your notes you bounced the flash off the ceiling to light the subject. That’s fine, but be careful when using this technique. If the ceiling is colored the light bouncing back may cause a color cast of whatever the color is. Just something to be aware of. The image itself does act as a good cover shot, but could do with a bit more contrast as the example on page 5.

Page 1 Preparation

The first image is biting sharp and the wording on the ingredients can be seen clearly. To improve this image get rid of the cacti in the background using the clone tool as it is a bit distracting.

The second image is fine. It clearly shows what the hand is doing and the skin tones are excellent.

It looks like you have used flash for your third image and this has resulted in the “hot spot” on the stainless steel cooker. Also the temperature reading has turned out a dull red because of the flash. The answer is to shoot this one again with the camera on a tripod and don’t use flash. This way you should have a brighter red on the reading.

Page 2 Opening the Ingredients

These three images are fine although the first one could do with being a fraction lighter on the flour bag.

Page 3 Adding the Ingredients

On image 1 you have added a bit more interest in the picture by doing an action shot and the chocolate chips can be seen very clearly dropping into the bowl. Had you used a slower shutter speed (1/15sec) this would have given more movement to the scene, but a good shot nevertheless.

On image two Lindsay is about to pour sugar into the bowl which can only just be seen in the bottom right hand corner and a viewpoint from slightly farther back or zoom out would be better to include more of the bowl.

Images three and four are both fine, but I would have put the unopened pack of butter before the jug shot.

Page 4 Liquid Ingredients

All these images are fine except the third shot which from what you say in your notes you are aware of. The answer to this would have been to pour the milk from a slightly higher position and against a darker background, just as you have done in image 4.

Page 5 Mixing

Again these are competent shots that illustrate the subject well, but clone out the mobile phone in the fourth image.

Page 6 The Oven

Direct flash would improve the lighting on the first two shots so that the background was lit up. The third shot is excellent and you should have used this technique for the first shot. The muffins can be seen very clearly because of the better lighting and look very mouth watering.

Page 7 Sampling

All the images on this page are very good. The texture of the muffin is evident on the last shot in which Lindsay is holding in her right hand. Well done and a very interesting assignment.

Other

Thank you again for allowing me to view your work. As always I hope you found the comments helpful as they are intended to be. May I take this opportunity to wish you well for your assessment, but if can be of any further help now or in the future please do not hesitate to get in touch.

Kind regards

Peter

Amendments

Upon receiving feedback from my tutor I took note of his advice and have edited some of my photos accordingly.

Below is a list of the affected images and the advice my tutor gave for each:

  • Cover Image – Increase contrast
  • Page 1 Top – Clone out cacti
  • Page 1 Bottom Right – Re-take without flash
  • Page 2 Top Left – Lighten bag of flour
  • Page 3 – Re-arrange photographs
  • Page 4 Top Right – Re-take using a dark background
  • Page 5 Bottom Left – Slightly increase contrast
  • Page 5 Bottom Right – Clone out the mobile phone

During the completion of my amendments I will re-post all of the images from the assignment because they work together as part of a narrative picture essay.

Cover Image Amended ISO-100, 144mm, 1/180sec, f/9.5cover This shot is the same as the original however I have slightly increased the contrast.

Page 1 Amended1 
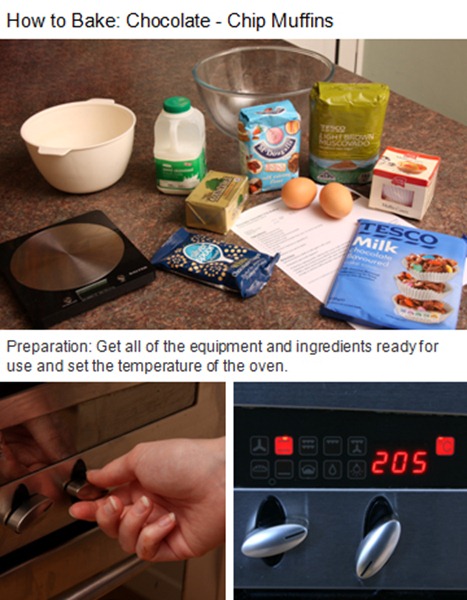
To begin with, I added a title to this page.

Top Amended ISO-100, 28mm, 1/180sec, f/8

To improve this shot I cloned out some Cactus that was in the background.

Bottom Left ISO-100, 88mm, 1/180sec, f/9.5

Same as original.

Bottom Right Amended ISO-200, 34mm, 1/2sec, f/5.6

To improve this shot I placed my camera on a tripod and didn’t use the flash. I also cut a hole in a piece of card so that I could place it over my lens. The card stopped there from being any reflections on the oven. The technique works and the temperature can be clearly seen.

Page 2 Amended2

Top Left Amended ISO-100, 72mm, 1/125sec, f/8

To improve this shot I cloned out some Cactus that was in the background.

Top Right ISO-100, 28mm, 1/125sec, f/8

Same as original.

Bottom ISO-100, 33mm, 1/125sec, f/8

Same as original.

Page 3 Amended3 

I re-arranged this page but didn’t do anything to the photographs.

Top Left ISO-100, 28mm, 1/90sec, f/8

Same as original.

Top Right ISO-100, 33mm, 1/90sec, f/8

Same as original.

Bottom Left ISO-100, 140mm, 1/180sec, f/8

Same as original.

Bottom Right ISO-100, 88mm, 1/90sec, f/8

Same as original.

Page 4 Amended4

Top Left ISO-100, 72mm, 1/90sec, f/8

Same as original.

Top Middle ISO-100, 33mm, 1/90sec, f/8

Same as original.

Top Right Amended ISO-200, 59mm, 1/160sec, f/9

I re-took this shot using a black sheet of card for the background. The original had a white background and the droplet of milk was barely visible.

Bottom ISO-100, 48mm, 1/180sec, f/8

Same as original.

Page 5 Amended5

Top Left ISO-100, 28mm, 0.7sec, f/11

Same as original.

Top Right ISO-100, 40mm, 1/180sec, f/8

Same as original.

Bottom Left Amended ISO-100, 144mm, 1/180sec, f/9.5

This shot is the same as the original however I have slightly increased the contrast.

Bottom Right Amended ISO-100, 18mm, 1/180sec, f/8

This shot is the same as the original however I have removed the mobile phone that was on the table between Lindsay and the jug. I used the Clone tool in Photoshop CS4 to remove the phone.

Page 6 Same as original6
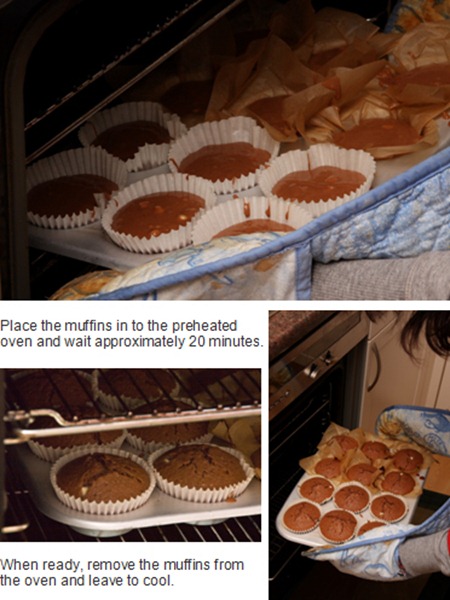
Top ISO-100, 88mm, 1/180sec, f/9.5

Same as original.

Bottom Left ISO-100, 200mm, 1/180sec, f/9.5

Same as original.

Bottom Right ISO-100, 40mm, 1/180sec, f/9.5

Same as original.

Page 7 Same as original7

Top Left ISO-100, 48mm, 1/180sec, f/9.5

Same as original.

Top Right ISO-100, 18mm, 1/180sec, f/9.5

Same as original.

Middle Left ISO-100, 72mm, 1/180sec, f/9.5

Same as original.

Bottom Left ISO-100, 28mm, 1/180sec, f/9.5

Same as original.

Bottom Right ISO-100, 59mm, 1/180sec, f/9.5

Same as original.

Amendment Summary

During the completion of my amendments I re-posted all of the pages because they work together as part of a Narrative picture essay.

Below is a list of the affected images and the improvements I made to each one:

  • Cover Image – I increased the contrast
  • Page 1 Top – Using Photoshop I cloned out the cacti
  • Page 1 Bottom Right – I re-took this shot without flash
  • Page 2 Top Left – I lightened the bag of flour using Photoshop
  • Page 3 – I re-arranged the photographs on this page as they were originally in the wrong order
  • Page 4 Top Right – I re-took this shot using a dark background
  • Page 5 Bottom Left – I increased the contrast of this shot
  • Page 5 Bottom Right – Using Photoshop I cloned out the mobile phone

Overall I feel I have followed my tutor’s advice quite well and have managed to improve the shots that needed amending.
Saturday 5 June 2010

Imperial War Museum

I recently visited The Imperial War Museum at Salford Quays in Greater Manchester.

iwm_left_logo[1]The museum was designed by architect Daniel Libeskind and opened in July 2002. It  was recognised with awards and prize nominations for its architecture. Libeskind envisaged a 'constellation composed of three interlocking shards' with each shard being a remnant of an imagined globe shattered by conflict. These shards in turn represented air, earth and water, and each formed a functionally distinct part of the museum. The 55m high air shard, provides the museum's entranceway and a viewing balcony above the Manchester Ship Canal with views of the Manchester skyline. The earth shard houses the museum's exhibition spaces, while the water shard accommodates a cafe with views of the canal. The museum features a permanent exhibition of chronological and thematic displays, supported by hourly audiovisual presentations which are projected throughout the gallery space. The museum also hosts a programme of temporary exhibitions in a separate gallery. I was particularly keen on viewing Don McCullin’s temporary exhibition of Photographs; Shaped by War.

sky fix

Shaped By War

 Delta Company, 1/5th US Marines in action during the Battle for Hue, Tet Offensive, Vietnam, February 1968. DM_317_20100115123110[1]A mortar section sprints through the ruins of Hue under sniper fire.

Photograph © Don McCullin

For more than 50 years, McCullin’s images have shaped our awareness of modern conflict and its consequences. His courage and integrity, as well as the exceptional quality of his work, are a continuing inspiration and influence worldwide. This major new exhibition contains over 200 photographs, objects, magazines and personal memorabilia, and shows how war has shaped the life of this exceptional British photographer and those across the globe over the last half-century.

I’m terrible at reviewing things so please find an in depth review and interview with Don McCullin at this link. The Observer - Sean O'Hagan

The hundreds of photographs of war, poverty, fear, and destruction were extremely moving. I’m glad I visited the exhibition as I find documentaries of War very interesting and like to learn how War has shaped the lives of people today.

Friday 4 June 2010

A Narrative Picture Essay

For Project 63: A Narrative Picture Essay, I decided that I wanted to create a storyboard of a band playing a gig. I’ve merged this project with number 62: Researching an Event as they flow nicely into one another.

13/05/10 Researching – The Hungry Pigeon Festival

Band: Clockwork Radio

Date: 28th of May 2010

Venue: The Waldorf in Manchester

Having contacted the band’s bass player (Nadim Mirshak), he assured me that taking my DSLR wouldn’t be a problem as they appreciate any free advertisement.

Members:

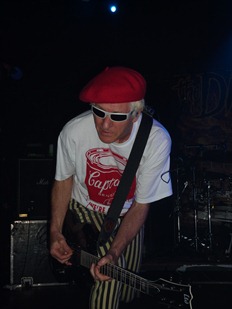
  • Rich Williams : Guitar/Vocals
  • Iwan Jones : Guitar/Backing Vocals
  • Nadim Mirshak : Bass
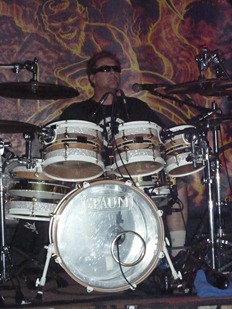
  • Dan Wiebe : Percussion/Drums

Unfortunately, there’s a band playing before Clockwork Radio and therefore I will be unable to take any photographs of the band setting up the stage.

Expected shots:

  • Equipment on empty stage before the show
  • The band coming on stage
  • Band setting up
  • Band playing
  • Audience
  • Individual members of the band
  • Close-ups of equipment
  • Band finishing
  • Band leaving stage
  • Empty stage at end

28/05/10 The Event: Clockwork Radio @Hungry Pigeon Festival

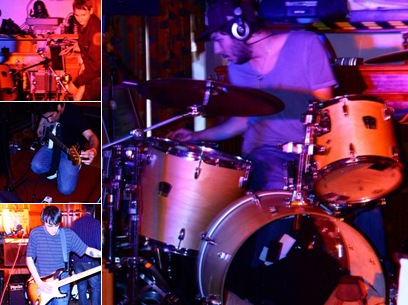
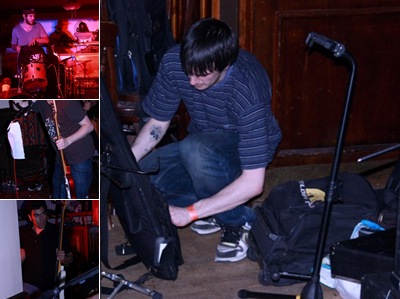
Setting up: Although the majority of the equipment was already on the stage, I managed to capture a few shots of the band plugging in their instruments and the microphone before it was in use.

Preparation and Tuning: The band also prepared and tuned their instruments on stage before beginning

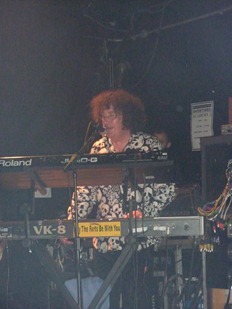
Beginning to play: As the band started to play, I battled the poor light conditions to attempt to capture sharp images.

Well underway: A few songs in and I’m still shooting, experimenting with telephoto and wide angle

The Crowd: The crowd watch on as Clockwork Radio do what they do best

Clockwork Radio_44

Coming to an end: As the band play their final song I capture what I can of the remaining few minutes

Packing up: The band pack away their equipment

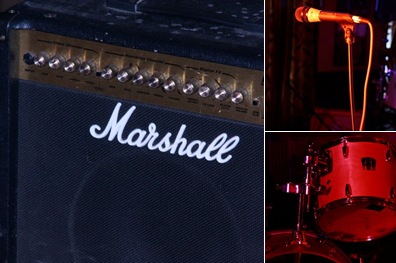
What’s left on stage? An amplifier, empty drum kit and an abandoned microphone

I thoroughly enjoyed watching and shooting Clockwork Radio! Their musical style is exactly to my taste being Hard, Alternative Rock. Check them out at http://www.clockworkradio.co.uk/

I’m very thankful to Clockwork Radio for letting me take photographs at their gig to help me with this project and in return I have given them my photographs to help them promote their band.

Thursday 20 May 2010

Macro Photography

Macro photography is close-up photography. The classical definition is that the image projected on the "film plane" (i.e., film or a digital sensor) is close to the same size as the subject. Lenses designed for macro are usually at their sharpest at macro focus distances and are not quite as sharp at other focus distances.

I feel that I have a very simplistic style and Macro photography some how suits this. I like how a subject can take up the entire frame but when magnified to the extreme it can be difficult to recognise. Another reason for my fascination of Macro would have to be that when a tiny subject is scaled up, we can see things that we may not have realised were even there.

At the time of taking this photo I was unaware that there was a spider web in the shotIMG_5704

Cactus with very short depth of field f/2.8IMG_5612

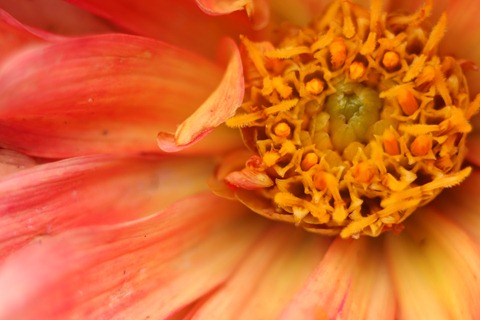
Centre of a flower in the gardenIMG_4097

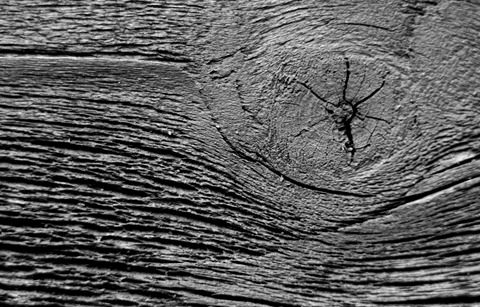
I decided to try macro in black and white as I find it to be very dramatic. I feel that the drama that black white brings to a shot gives simplistic subjects much more texture and interest.macro wood b w

Not quite as extreme magnification as other shots, however it is still macro and it is one of my favourites.the old door2

 wood2

Thursday 13 May 2010

Juxtaposition

My favourite definition of juxtaposition comes from the “Dictionary of Art Terms” on “BluemoonWebDesign.com”. They state that Juxtaposition is “the act of placing or positioning items in the image area side by side or next to one another to illustrate some comparison.” This definition clearly tells us that Juxtaposition doesn’t just mean “contrast” as I had previously believed.

I decided to take a photograph of my girlfriend Lindsay holding a Polaroid camera whilst looking at some of the photographs that she had taken.

Untitled Lindsay is a photographer, however she doesn’t shoot with a Polaroid camera. I took some of her photographs and created the “Polaroids” in Photoshop, these can be seen below in more detail.

polaroids

Evidence of Action

Evidence of Action implies exactly what you’d think, a shot of a scene where it is clear that something has just happened. I decided that one of the best ways to illustrate such an event would be to shoot a broken object. Being very clumsy it wasn’t long before I dropped a plate, so grabbed my camera and captured the result.

IMG_4917 My shot of the shattered plate clearly tells us that it has just been dropped.

Examples of illustrations regularly used in advertising include:

  • Shields/umbrellas/fortifications and cupped hands (insurance)
  • Emotional Displays, smiling to show people are happy with product/service and vice versa
  • Companies create logos to make themselves instantly recognisable (Nike Tick)
  • Feathers are used to illustrate that something doesn’t weigh very much
  • Different shapes are used to symbolise many things, heart = “love”, crucifix = “hope and faith”, red cross = “help and rescue”
  • Colours are used to symbolise emotions and temperature, red = “hot and passion”, blue = “cold”
  • Growth; a shoot of a plant beginning to grow, silhouettes of 1 person at multiple stages of their life
  • Excess; something overflowing
  • Crime; white body outline, handcuffs, yellow tape, swag bag
  • Silence; finger held to lips
  • Poverty; people begging, starving children, people living in squalor

Monday 10 May 2010

7: Narrative and Illustration

"The aim of 7: Narrative and Illustration is to help you to approach photography from the point of view of the subject and to show how to tell a story both in a set of pictures and within a single picture. This includes learning the techniques of visual analogy, juxtaposition and certain special effects."

Photography isn't just about capturing attractive images. Sometimes the subject is far more important than composition, balance or colour thus meaning that a photograph for a newspaper or magazine is generally used due to how successful it is at informing us about a person or event. However important the subject is, the image will always be improved if it is skilfully handled.

In photography, a Narrative is the way of telling a story through a set of images. This tends to be easier than trying to sum up a story in a single photograph (Illustration). However, Illustration can have much more impact and ultimately be more memorable.

Saturday 8 May 2010

Thoughts and Feelings

The aim of 6: Artificial Light was to familiarise me with the properties of Artificial Light sources so that I can achieve successful exposures and colour balance. Another was to introduce me to the use of photographic lighting and the idea of controlling light to create particular effects.

Artificial Light is much weaker than daylight, therefore a tripod needed if a low ISO setting (eg ISO 100) is being used. For hand held shooting, a high ISO setting can be used (eg ISO 1600). The drawback to high ISO is that photographs will be very grainy.

Whilst completing Artificial Light I have been made more aware of the three types of available light; Tungsten, Fluorescent and Vapour Lamps. With a camera's white balance set to daylight, Tungsten light photographs reddish, Fluorescent - cool blue, Sodium Vapour Lamps - Orangey Yellow and Multi/Mercury Vapour Lamps - cool tones. I have learnt that to counteract the colour cast from these light sources I need to place filters over my lens, eg to shoot with daylight balanced film in a tungsten lit environment, a blue filter needs to be applied in order to capture natural tones. Alternatively, when using my DSLR, I can simply change the white balance setting to Tungsten.

I have also learnt how to appropriately utilise Photographing lighting and the accessories associated with it. To help me in the completion of a number of projects I purchased a budget studio flash, diffuser and created some basic reflectors and an absorber. Using a diffuser reduces contrast and smooths out shadows. Reflectors are useful in reducing contrast even more. When placed on the opposite of a subject to the light source, they bounce light back towards the subject. Absorbers increase contrast. When placed as close to a subject as possible, on the opposite side to the light source, they inhibit light from reflecting back towards the subject.

To take a standard portrait shot with minimal contrast, the flash unit should be diffused, aimed directly at the model and be at the same level as her and the camera. Alternatively, a second flash unit could be used. Each one should be placed either side of the camera and aimed directly at the model, reflectors can then be used opposite each flash unit and slightly behind the model to ensure there's no dark areas on her sides.

Another use of Artificial Light is to capture light trails at night. This is the use of long shutter speeds to capture any light moving across the frame as a stream. One of the most popular ways to use this technique is by shooting cars head and tail lights. This is quite a technical process as the shutter speed has to be long enough to capture the passage of light (or multiple lights) through the frame, yet the aperture and ISO need to be set so that the rest of the image remains correctly exposed (or not exposed at all).

Thursday 6 May 2010

Light Intensity

To help me learn what happens to light from flash units at different distances I recorded the aperture I would need to use to correctly expose a shot every 2 metres. I set my shutter speed to 1/25sec and laid out a tape measure along the floor. Unfortunately the cable for my flash meter is only 8 metres long and therefore could only take light readings up to this distance. Pointing the flash unit directly towards me and holding the meter towards it, I began to take readings at at ISO 100 at 1m then 2m, 4m, 6m and finished at 8m. I decided to take readings at different ISOs (100, 200 and 400) to compare the differences. My results are shown below.

Table of resultstable

Graph showing how the distance from a flash unit effects exposure with the shutter speed locked at 1/20secgraph

From the graph we can clearly see that the closer the flash unit is to a subject, the smaller the aperture needs to be in order to correctly expose a shot.

I have also added two extra lines to the graph; at midday on a sunny day and at midday on a cloudy day. These lines are perfectly straight across the graph because distance doesn’t make any difference to how bright the sun is as it is already very far away.

Opening the aperture by one f-stop will let twice as much light into the lens. At twice the distance from any point near the flash unit the light level will be four times less so to compensate for this the aperture will have to be opened by two stops.

Saturday 1 May 2010

Gigs

I have quite an intense love for music and so over the past few months I’ve been to a number of gigs with my girlfriend Lindsay. Unfortunately I was unable to take my DSLR to any of these but that didn’t stop me taking my 10megapixel Panasonic Lumix DMC-ZS1 with 12x Optical Zoom. With my liking of Rock music and being up for hearing anything new I went to see Alkaline Trio (one of Lindsay’s favourite bands) and actually managed to capture some quite reasonable shots.

Alkaline Trio

 P1010207_thumb[2]   P1010229_thumb[2]

 P1010244_thumb[2]   P1010249_thumb[2] 

The Damned

Next we went to see The Damned. The Damned have been my favourite band for almost 8 years (I’m 22 now so would have been 14 or 15 around the time that I discovered them). They formed in 1976 and became Britain’s first Punk band with their single New Rose, released on October 22nd, that year. This was quite a surreal experience for me as I never believed that I would see them live with not even being born when they formed.

P1010348  P1010445

P1010357

 P1010359  P1010398  

P1010382

 P1010418 P1010419 

P1010471 

The Damned – Smash it Up

Green Day

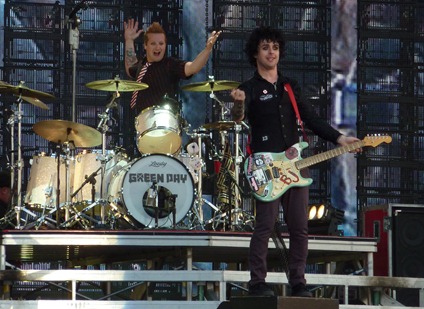
And finally we went to see Lindsay’s favourite, Green Day. Possibly the most famous of the three bands I’ve listed here. We were much further back at this one as it was in an open air stadium but the natural outdoor light has enabled me to capture some very pleasing shots.

billy n girl billy n trey

bill n bass

In the future I hope to get my DSLR to some of these gigs and capture some much more impressive shots. It’s a shame at Green Day that my Battery ran out, they put on an incredible show of fireworks, explosions, water canons and all sorts!