Saturday, 20 March 2010

Northumberland Visit

Being on the border of England and Scotland, Northumberland has been the site of many battles. The county is noted for its undeveloped landscape of high moorland, a favourite with landscape painters, and now largely protected as a National Park. Northumberland is the most sparsely populated county in England, with only 62 people per square kilometre.

Whilst visiting my girlfriend in Bedlington, Wansbeck we went for a stroll and stumbled across an old Styal during sunset.

DPP_0200

Angel of the North

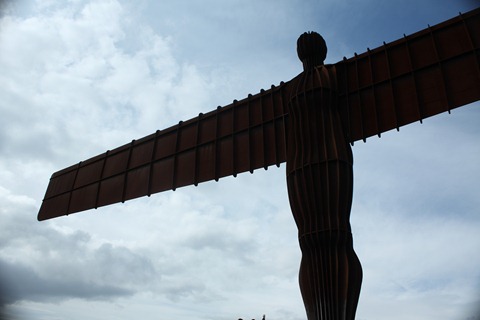
The Angel of the North is a contemporary sculpture designed by Antony Gormley, which is located in Gateshead.

As the name suggests, it is a steel sculpture of a graceful angel, standing 20m tall, with wings measuring 54m across. The wings themselves are not planar, but are angled 3.5 degrees forward, which Gormley has said aims to create "a sense of embrace".It stands on a hill, on the southern edge of Low Fell overlooking the A1 road and the A167 road into Tyneside and the East Coast Main Line rail route, and just south of the site of Team Colliery.

A silhouette of the Angel approaching from behindDPP_0014
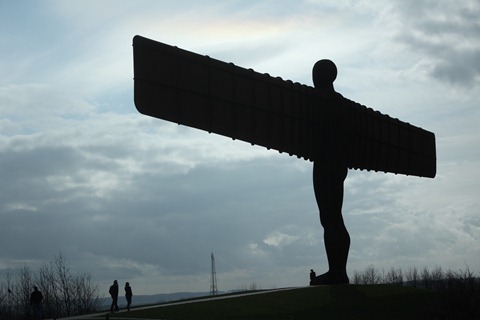
  Taken from in front of the sculptureDPP_0103

Behind the Angel and looking up from the base, this my favourite shotANGEL 

The area was once part of the Roman Empire and as Northumberland it was the scene of many wars between England and Scotland. As evidence of its violent history, Northumberland has more castles than any other county in England, including the castles of Alnwick, Bamburgh, Dunstanburgh and Warkworth.

Warkworth Castle

Warkworth Castle is a ruined, although reasonably well preserved castle, situated in Warkworth, Northumberland, on a defensive mound in a loop of the River Coquet. It is a Grade I listed building.

Warkworth Castle was originally constructed as a wooden fortress, some time after the Norman Conquest. It was later ceded to the Percy family, who held it, and resided there on and off until the 16th century. During this period the castle was rebuilt with sandstone curtain walls and greatly reinforced. The imposing keep, overlooking the village of Warkworth was added during the late 14th century. It was refurbished, with much refaced stonework, by the Dukes of Northumberland in the late 19th century.

Taken from a distance on a Panasonic ZS1 compact38202_419359404028_509209028_4587905_3751303_n[1]

Taken from one side with Canon EOS 450d DSLRDPP_0252
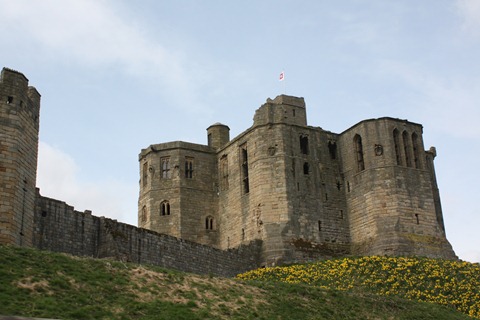
A wide angle shot of the Castle entrance, taken with Canon EOS 500n film SLRimg019  

Dunstanburgh Castle

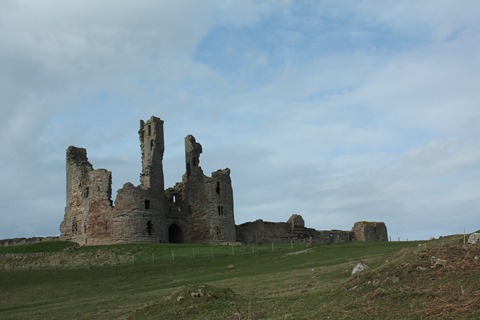
The Castle lies on a spectacular headland on the coast of Northumberland in northern England, between the villages of Craster and Embleton.

The castle is the largest in Northumberland and the site shows traces of much earlier occupation before the erection of the castle was started in 1313 by the Earl of Lancaster.

DPP_0335  DPP_0437  DPP_0417

Monday, 15 March 2010

Tatton Park

Tatton Park is one of the UK’s most complete historic estates. The Mansion, Gardens, Farm, Old Hall, 1,000 acre deer park and speciality shops offer something for everyone along with over 100 events annually. The award winning estate receives over 750,000 visits each year and many people return again and again to enjoy this stunning area of Cheshire. It has a history dating back to Bronze Age farming and has been home to herds of deer since the 13th century.

There’s plenty of things to do and see at the park, these include; Hiking or Cycling around the 1,000 acres of open park land, watching and photographing the 400 Red and Fallow Deer and other rare animals, visiting the Mansion, Old Hall or Farm, strolling round the picturesque Gardens, Fishing or Sailing in the Mere, explore the woodland, Horse Riding, playing with your kids in the playground and Maze, attending one of the 100s of events a year, Shopping, eating in the Restaurant or just having a picnic or BBQ, there really is something for everyone!

Below I’ve added a few of my photographs taken at Tatton Park. As soon as the nice weather returns I’ll be back there with my camera and this time with my bike so I can explore the area even further.

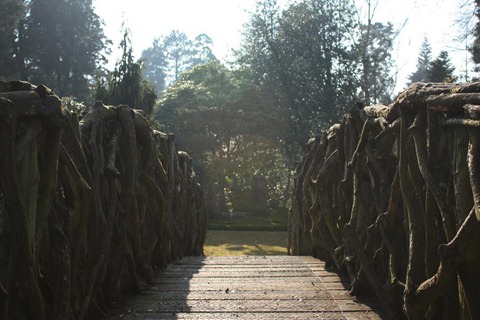
bridge...Bridge across the lake in the Gardens

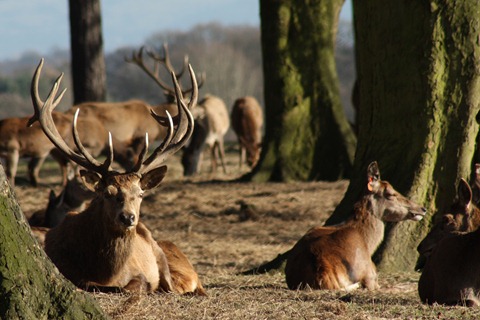
deerRed Deer in the hundreds of acres of Parkland

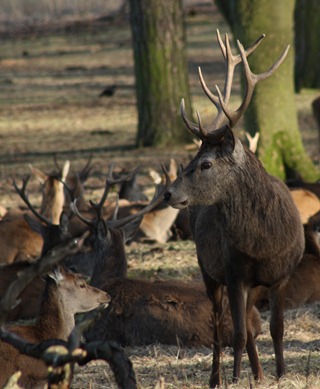
deer2 More Deer

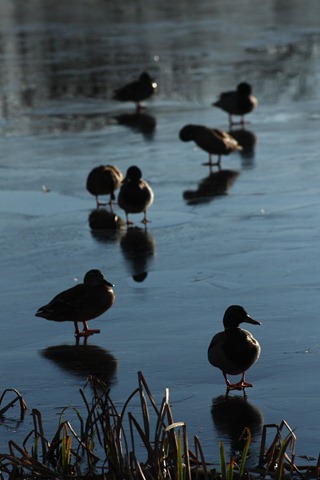
ducksDucks on the frozen Mere

gate archGate leading to Parkland

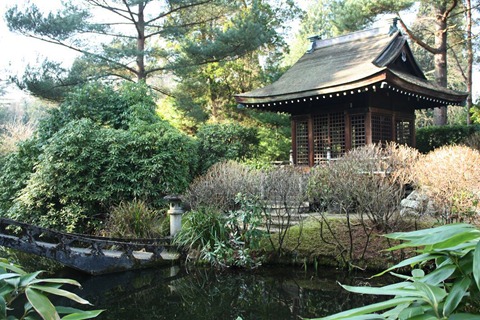
japan Ornamental oriental sculpture in the Japanese Garden

japan2Part of the Japanese Garden

linzi Lindsay in the Woodland near to the Mere

un-crossable bridgeOne of the many bridges in the gardens

Thursday, 11 March 2010

Making the Best use of Built in Flash

Using my cameras built in flash as the main source of light I have conducted a few tests to help me understand the different uses that it has. To view larger versions and technical details of all of the images below, please click on each ones title to take you to my set on Flickr.

Flash at different distances

flash distance


Flash with objects


Flash with grey card


My first test demonstrates what happens when using flash to shoot multiple subjects at different distances. From the two test shots, it is easy to see that objects closer to the camera will be much brighter than those further back.

Using built in Flash outdoors

birdhouse flash


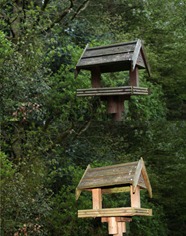
No Flash


Flash


Flash can be used outside to light the main subject (if it’s close to the camera) more than its surroundings. In the first test shot, the birdhouse is dull and blends into the background, however, when flash is used the birdhouse stands out and makes for a much more interesting shot.

Shiny Surfaces

shiney


No Flash


Flash


When photographing shiny subjects, whether using flash or not, their entire surroundings are reflected in their surface creating a very displeasing result. I was unable to create a pleasing image with my built in flash, however, I have studied shiny surfaces further and this can be found in Project: 60 - Shiny Surfaces.

Matt Surfaces

matt


Flash


No Flash


Built in flash works quite well when shooting matt surfaces. A lot more detail is visible as it fills in the dark areas.

Bright Colours

colours


No Flash


Flash (correctly exposed)


Flash (and underexposed by 2 stops)


Shooting very colourful subjects without the use of flash produces adequate results, however, when shooting with flash, the colours appear much brighter. It brings much more contrast to shots as the background is still quite dark. Underexposing by 2 stops creates the best results.

Macro (Cactus)

macro


No Flash


Flash (correctly exposed)


Flash -1


Flash –2


Flash –4


Flash -6


Taking very close-up macro shots while using built in flash can overexpose subjects if the settings for shooting the same scene without flash are used. At the correct exposure, using flash, the background is quite bright, to alter this reduce the shutter speed by a number of stops. My tests show that even reducing the shutter speed by 6 stops will keep the main subject nicely exposed but give a dark background.

Telephoto

telephoto


No Flash


Flash (correctly exposed)


Flash –1


Flash –2


Flash –3


Flash –4


Flash –5


Telephoto shots are the opposite to macro. The settings used without flash can still be used when adding flash but when reducing the shutter speed at all the whole scene, even the main subject, becomes under exposed. This is due to the distance that the subject is away from the flash. I have also studied this effect further and can by found in Project 55 - Light Intensity.

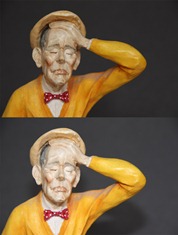
Intricate Detail (golfer figurine)

shallow scene intricate


No Flash


Flash


When shooting subjects with intricate detail, flash creates harsh shadows and very bright areas on the subjects. More detail is visible without the use of flash. In the shot using flash, the face is too meaning that the detail of the cheek bones and eyebrows are harder to see.

Bright Background (Shadow Fill)

bright background


No Flash (Correctly Exposed)


No Flash (+1)


No Flash (+2)


Flash (shadow fill compensation –2)


Flash (shadow fill comp –1)


Flash (Shadow fill comp 0/standard flash)


Flash (Shadow fill comp +1)


When shooting subjects that are already brightly lit from behind, the subjects themselves can end up underexposed and appear as silhouettes. In my first shot, the background is correctly exposed but the main subject is too dark. When bracketing the shot, to see if I could correctly expose the subject, the background becomes too bright and overpowers the image. Using my camera’s built in flash to fill in the shadows I was able to obtain a correctly exposed background and subject. Setting my flash’s shadow fill compensation to –1 has given me the best result. Using standard flash with no compensation is also acceptable but I feel it’s slightly too bright.

Diffused

diffused flash


Flash


Flash + diffuser


No Flash


Finally I decided to experiment with a small homemade diffuser (piece of white paper). When using flash by itself, harsh shadows are visible in the photographs; adding a diffuser removes the harsh shadows and nicely exposes the subject. Without flash, the subject seems very dark as the background is very bright.

TECHNICAL SETTINGS AND BIGGER IMAGES
To view the technical settings used in capturing all of the photos above or just for a closer look at all of the images from this post please visit my Flickr set entitled Project 61.

Shiny Surfaces

Shiny surfaces are very difficult to shoot well. They reflect everything around them and therfore a special technique needs to exist in order to capture them professionally. The subject I chose to use is a stainless steel measuring spoon.

The first image is a photograph of the spoon under normal conditions without the use of flash. My camera and I can be clearly seen being reflected in the spoon's dome.

When flash is added, the results worsen.

The simple technique of creating a cone from translucent paper to place over the shiny subject improves the results dramatically. The wide end of the cone is placed over the subject and at the small end there needs to be a hole for the camera's lens. Keeping the same composition as above I have added a cone and taken a few shots to show it's effect.

The first shot shows what the spoon looks like using a cone and being flash from infront.

Flashed from the left.

Flashed from the right.

And finally, flashed from above.

It is incredibly difficult to obtain attractive and accurate shots of shiny objects, however, I feel that placing a cone of translucent paper over my subject and placing the flash above is the best technique.

With a lot of objects the reflection of the lens could be hidden by altering the composition. The shiny subjects position could be changed, other subjects could be placed in front of it and/or the camera could be moved to a different angle.

Outdoors at Night

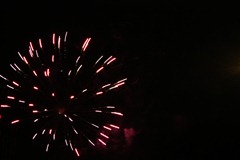
Here I have some shots that I took outdoors at night. My first few are fireworks. It is very difficult to capture stunning firework images without the use of a tripod, however I feel I have obtained some acceptable results. For each shot below my camera was set to 1/13sec, f/5.6, ISO 400. Had I been using a tripod I could have used a much longer shutter speed to capture more of the explosion’s movement.

New Years Eve - Newcastle City CentreIMG_1252IMG_1251

My next image is actually a manipulation of the two photographs above plus a further four (all of which I shot). Having placed the photographs on top of one another and in my desired orientation using Photoshop, all that’s left to do is to set each layers “Blend Mode” to “Lighten” apart from the bottom layer; this creates an image that appears to have many more fireworks in it than it actually does.fireworks overlay

My final fireworks shot was taken with the same settings as mentioned above and is a single shot of multiple explosions.IMG_1562

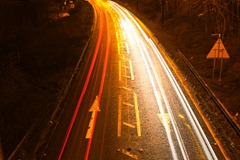
Next I decided to experiment with light trails; this is the use of long shutter speeds to capture any light moving across the frame as a stream. One of the most popular ways to use this technique is by shooting cars head and tail lights. This is quite a technical process as the shutter speed has to be long enough to capture the passage of light (or multiple lights) through the frame, yet the aperture and ISO need to be set so that the rest of the image remains correctly exposed (or not exposed at all).

First attempt – Taken from a window at home of three cars driving past.Light Trails 1stISO 100, 6secs, f/5

If not enough cars drive past to leave a sufficiently attractive image, Photoshop can be used to layer multiple shots together.

Taken from a Pedestrian overpass along the Carrington Spur (Ashton-on-Mersey, Sale)new ISO 100, 4secs, f/6.3

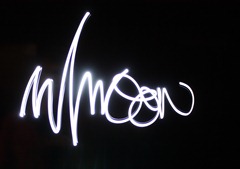
For my final experiment with light trails I aimed the camera at myself, shone a torch back towards the lens and wrote my signature in the air. I had to flip this shot horizontally in order for it to be the right way round and I feel I’ve captured quite an impressive example of the technique.

My signature (M L Moore)IMG_0188 ISO 400, 3.2secs, f/3.5

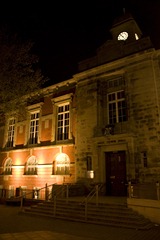
Shooting buildings at night can be quite complicated. Getting the exposure right can be difficult as the lit areas are extremely bright and dark areas come out very under exposed. Below is an example of a flood lit building where naked lamps aren’t actually visible. In this situation, the camera TTL metering system works quite well at calculating the correct exposure settings to use. Setting my cameras white balance to tungsten seems to have corrected much of the orange haze visible when shooting with the daylight setting.

Sale Town HallDPP_0004Tungsten Balance

IMG_4712 Daylight Balance

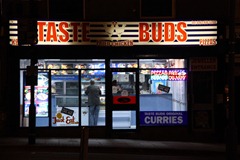
Next, brightly lit buildings such as the take-away and DIY shop below completely overpower the shot. The store fronts are so bright that correctly exposing for them severely under exposes their surroundings. Correctly exposing for the surroundings would leave the stores ridiculously over exposed. The type of lights that are mainly used in these situations are fluorescent and therefore setting my cameras white balance to fluorescent will alter any colour casting.DPP_0013IMG_4725

When shooting scenes which contain small bright naked lights, overexposing these lights is the only way correctly expose for the rest of the scene.IMG_4765 

The photograph below is an example of a shot over a city/town.

Taken from Werneth Low, Stockport – Looking towards HydeIMG_0834  

The shot below is the road outside my house. The vapour street lamps give the image and extremely orange colour cast.IMG_4680

For my final experiment I decided to take photographs of candles at night. My first image is of my girlfriend Lindsay behind two homemade lanterns. The very low colour temperature of fire, combined with the red colouring of one of the lanterns turns Lindsay’s face bright red even when using tungsten balance. IMG_9931

  For my very last shot I placed lanterns on different branches of trees and correctly exposed for the lanterns; this give the illusion that they are floating around in the pitch black.IMG_9963